Showing posts with label yum. Show all posts

Friday, April 22, 2016

South of the Boarder Smothered Corn on the Cob

I can't even!  This is absolutely the tasty thing ever, and here's the
recipe just in time for your Cinco de Mayo celebrations 
and backyard picnics and cookouts. 

What you need:
cooked corn on the cob, set to room temperature (make in advance, chill)
Hellman's mayonnaise 
chipotle chili powder (sub chili powder, if you want flavor but no heat)
queso fresco (a chunk that can crumble)

On a prep surface, crumble queso fresco.

Mix the mayonnaise with the chipotle chili powder (make it
as spicy as you want.  I did 1/4 cup mayonnaise to 1 & 1/2 tsp powder)

Spread the mayonnaise onto the cooled corn (1-2 Tablespoons),
covering the surface.  Then roll in the crumbled cheese. 

Messy, but worth it. 

Seriously, this is ridiculous!  The sweet of the corn balances so 
nicely with the tang and spice of the chipotle mayonnaise and
the crumble cheese coating brings it all together!

xo.

Friday, January 22, 2016

Flavor Filled Cream Cheese & Bagels

Bagels and delicious, flavor-filled cream cheese give me a 
bad case of nostalgia.  Maybe it's because they were all
the rage in the 90s, with shops popping up everywhere in the
midwest? Maybe it's because I worked a stint at a bagel
shop in college? Whatever it is, I love kicking it old school
(ugh, the 90s officially feel old school as plaid has officially
come back around) and toasting up chewy bagels and
slathering them with cream cheese.  Here are two 
quick and simple recipes for flavor-filled cream
cheeses to whip up.  

One sweet and One savory, so I gotcha covered.
8 oz container of whipped cream cheese
1/2 tsp ground cinnamon
1/4 cup honey
pinch of salt

Blend with a spoon to fully incorporate all the flavors
Starting with whipped cream cheese prevents you from 
having to get out the food processor.  Score!

the addition of chopped, lightly toasted
pecans would be delicous, FYI

8 oz container of whipped cream cheese
1/4 cup chopped scallions (chop up into the greens)
1/4 cup chopped sweet peppers (I love the mixed
bag of sweet yellows and red baby peppers)
salt & cracked black pepper, to taste

Blend with a spoon to fully incorporate all the flavors.

 Enjoy.  

I pop the flavored cream cheeses back in the container
the whipped cream cheese arrived in, and the spreads are 
good and ready to go!

Slather on, my bagel loving friends. 
xo


Tuesday, December 15, 2015

Gift Idea: Homemade Marshmallows & Cocoa Mix


My love affair with homemade marshmallows began years ago, when my husband was in grad school, we were living in Oregon and I made a ridiculous purchase of marshmallows at Williams-Sonoma.  I still, to this day cannot believe I paid so much for those marshmallows, but they were good and I figured I would give it the o' college try (errr, grad school wife try, rather) and see about making them myself.  I did, with great success (cutting them into shapes that first year.  Trees for Christmas, hearts for Valentine's Day), and have never looked back (well, I do still look at the back of the box, when I pop into Williams-Sonoma, to see the price climb each holiday season).  Here are two recipes that will make you feel like a gift giving champ!

Find my recipe, for fluffy marshmallow perfection in a blog post 
from several years ago.  Marshmallow link.

See all those delicious flecks of vanilla bean?  Be still, my heart.

You'll see the full step by step on the old marshmallow post, but 
I cannot get over how much I love cutting huge, square marshmallows!

I bought cute little paper 'fruit' crates at the craft store (they were
labeled as food safe, FYI) and then popped the filled crate
into a clear cello bag and tied with hemp rope.  I decided I needed
to send hot chocolate with the homemade marshmallows, so I filled 
large Ball jars (they were narrow, yet rather tall...a style I had never
seen before, but am now obsessed).  To create this hot chocolate
concoction of love I put the grater attachment in my food processer
 and shaved big bars of dark chocolate (I bought the large bars
from Trader Joe's).  The shavings yielded quite a bit, but I decided
I wanted to gift more hot chocolate so I did equal parts dark chocolate
shavings, unsweetened cocoa powder, confectioner's sugar and a
pinch of sea salt. 

YUM YUM YUM!
On the back of the little label I attached to the 
hot chocolate mix, I placed the directions of
1/3 cup mix to 1 cup hot milk.

I think this is a gift that should extend well into the New Year!
Who wouldn't love to receive this from their Valentine?

xo.


Tuesday, December 8, 2015

Maple & Bacon Spiced Almonds


I always make spicy candied almonds (or pecans) for salads,
but the addition of bacon...oh my!!!  I just know you will 
love this one!

What you need:
2 1/2 cups raw almonds
1/2 cup pure maple syrup
1/4 tsp cayenne pepper
5 strips of  center cut bacon, chopped up
Generous cracks of sea salt
Use kitchen shears to rough cut 5 strips of bacon and place in
a pan over medium/high heat.  

Separately:  preheat oven to 325

 Brown the bacon bits thoroughly, then remove the bacon 
from the pan. Center cut bacon does not render much fat
so there will be about a tablspoon of bacon fat in the pan. 
Leave it in the pan.  

IF YOU ARE USING LEFTOVER BACON FOR THIS
RECIPE, ADD 1 T. OF BUTTER TO THE HOT PAN AND 
CARRY ON WITH THE RECIPE.

Add the raw almonds and maple syrup to the bacon fat, in the
pan over medium/high heat.

Stir and coat.  Allow the maple syrup to bubble and reduce, 
while stirring constantly for 5 minutes.

After 5 minutes, all of the almonds should be coated in thick
maple syrup reduction. 

Turn off heat and return the bacon bits to the pan, along with
cayenne pepper (if you want a bigger kick, add more), and
a very generous dusting of sea salt. Stir to incorporate.

Pour the mixture onto a parchment paper lined sheet tray and
spread the almonds and bacon out into a single layer
Place the sheet tray in the preheated oven and cook for 7-9 minutes.

Remove pan from the oven and allow the coated almonds 15-20 
minutes to cool.  Then, try not eating them all.
 
Allow to cool completely, at least 1 hour before packaging up.

I am packaging up the almonds to give as gifts.  
This time of year you can find adorable containers in every store, 
otherwise, store the almonds in a sealed container or bag at room temperature.

Enjoy!
xo

Monday, July 20, 2015

Picnic BLTs


Several things in this great life give me great happiness, and I feel so lucky that I got to enjoy a few of my favorites, all squished into one night last week.  A picnic at Chatauqua Park in Boulder with girlfriends, before catching one of my favorite musical groups, The Indigo Girls, play at the auditorium at Chatauqua (which after Red Rocks is my most favorite of concert venues as it feels so very much like the mess hall at the summer camp I grew up at).  Oh, and I made BLTs for said picnic, so that is a grand tally of 4 of my favorites, in one night.

BLTs are classic.  They are summer.  They are picnic.  But...are you like me and are kind of ruded out by how soggy the bread is by the time you open your picnic basket, because of the (delicious, summer time favorite, for reals...just not here) tomatoes?  Well, I solved that problem years ago with delicious sun-dried tomato mayonnaise.

What you need:
bacon
3 T brown sugar
cracked black pepper
mayonnaise
sun-dried tomatoes
loaf of bread (ciabatta was my pick)
lettuce greens

Line a baking sheet with aluminum foil and a piece of parchment paper.
Place bacon and sprinkle with 3 T brown sugar and a very generous
crack of black pepper.

Bake in a 375 preheated oven for 20-23 minutes. If you 
want crisper bacon, watch oven closely as the sugar
will cause a quick burn, towards the end of bake time.

Delicious peppery, sweet bacon!  This is after 20 minutes bake time.

I promptly prop the baking sheet, so all the bacon grease will
drain off to the bottom, as it is impossible to 'blot' bacon that
has been baked in sugar...unless you love eating 
delicious peppery, sweet, PAPER coated bacon!

 Place 1/2 cup sun-dried tomatoes (drained) and 1 cup mayonnaise
in a food processor.  Pulse until the tomatoes are fully 
broken down and incorporated throughout.

This recipe will make much more that you will need for this Picnic
BLT, but be prepared to thank me as it is good on everything!

 I placed the sun-dried tomato mayonnaise in the deli container that
first housed the oil soaked tomatoes.  I did drain off most of the oil
before pulsing, but did not think to wipe the container clean.
But...a little sun-dried tomato infused oil will do zero harm to
this goodness.

I like to make in advance to allow the flavors to love each other up,
at least over night.

 Holy Toledo, this might be the best store bought 'artisan' bread
ever.  I picked it up at King Soopers (Krogers).

I used a serrated knife to slice the loaf in half, then popped it in the
oven (with the loaf closed up) to allow the outside to toast up a bit.
350 degrees for 8- 10 minutes.  It was good and crusty on the
outside when I pulled it out.  I then opened and gave the bread 10 minutes
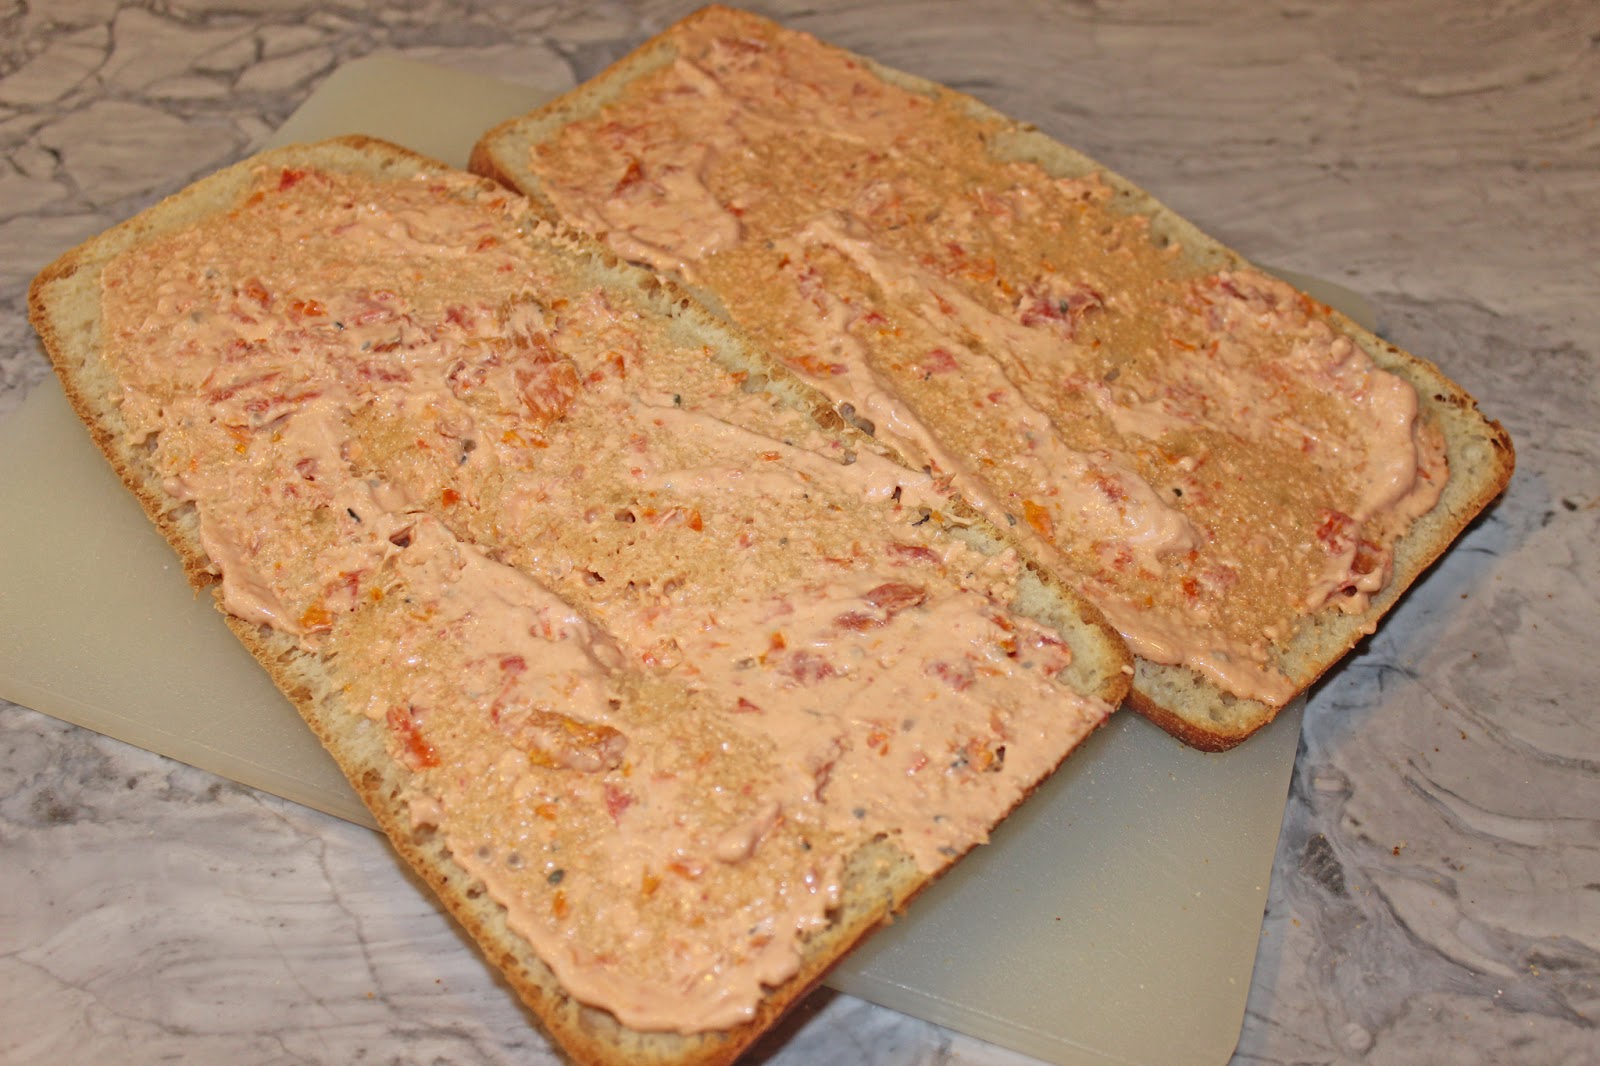
to cool down then generously slathered the bread with the sun-dried
tomato mayonnaise.

Layer on the candied bacon and a huge, heaping pile of greens.

 No words!  Cut how you wish OR pretend you are Rodney
Dangerfield in the 'sandwich scene' from Back to School
and eat the whole thing!  Here is the clip from the movie, if you
are all like, this B be crazy!

I wrapped each cut of sandwich in parchment.

The sandwiches joined iced coffee, palmier cookies and raspberry
and dark chocolate brownie & mousse trifles, as my picnic
contributions.  My girlfriends and I were so on point with our
picnic planning that our spread was one for the books.
I will later blog the palmier and trifle recipes, but until then
try these legit BLTs! Oh, and as usual...The Indigo Girls
were AmazeFest!

xo


Tuesday, July 14, 2015

Tater Tot Hotdish Burger

The cool weather of late (of course, not today) has me in a 
Minnesota State (Fair) of Mind! 

It might also be that I just saw the official roll out of new delicacies
on a stick that one can find at said fair...but regardless of the reason
this little creation I dreamed up a few weeks ago has me thinking
of home.

Two things that Minnesotans love: Hot dish (anything baked in a 
casserole dish, for those not in the know) and Burgers. 

Minnesotans especially love the classic Tater Tot Hotdish, which
is a ground hamburger and cream of mushroom soup base, topped
with tater tots.  Sounds rather rude, but it is perfection in a 9x13.

 Marrying these two favorites seems like a no brainer, 
SO WHY DID I JUST THINK OF THIS? 
Oh dear lord, this is absolutely a must try.  
And on the plate in under 30 minutes...what are you waiting for?

 What you need?
burgers (however you like: turkey, veggie, beef, buffalo)
frozen tater tots
3/4 cup yellow onion (chopped)
3/4 cup mushrooms (dry cleaned and chopped)
6 oz. whipped cream cheese
hamburger buns
salt & pepper
oil for sauteing

Saute the onions and mushrooms in 2 T. oil, generously cracking
salt and pepper while they cook down over medium heat.  
Do this while cooking the burger, season each side of the 
burger with salt and pepper.

Also oven cook tater tots (according to package directions)

 When the onions are transluesent and the mushrooms are soft, 
turn off the heat and fold in 6 oz of whipped cream cheese.

This will act as the "cream of mushroom soup" 
component of the classic Tater Tot Hotdish.

 Building the perfect Tater Tot Hotdish Burger:
bottom toasted bun
burger
generous dollop of creamy mushrooms and onions
5 crispy tater tots
top with the other toasted bun.

And because gluttony likes green company,
serve with a mixed greens salad.

I want full report, if you make this for your
great aunt in Northern Minnesota.

xo.


Thursday, May 28, 2015

Pretzel Brownie Ice Cream Sandwiches. OMG.

Just FYI, these are outrageous!

I blogged delicious brownie ice cream sandwiches a long time ago,
and was whipping them up yesterday as friends were coming to dinner
and I was wildly inspired (I am clearly deep) to roll the ice cream
edges in salty bits of pretzel.  Oh wow, that took deliciousness to a 
whole new level.  

PS sweet and salty for the win!

Click here for the original ice cream sandwich recipe. And then
get a rolling in pretzel bits.

xx

Friday, May 8, 2015

Loaded Banana Bread

My dear, sweet Benny (2 years old) is really into bananas.  
His love of bananas runs deep.Yet, the depth of said love lasts only 
about 3 bites per banana and then he refuses to touch the half eaten 
banana again. And we must start over with another whole banana. 
Lordy. 
I, being the practical 'thou shall not waste a perfectly
 good half of banana' mama that I am, 
started storing the remaining bananas in a container in the 
refrigerator and decided it was high time I create a go to banana recipe. 
So Benny, keep up the good work, I could eat this goodness all year long!

This recipe will yield 2 large loaf pans of outrageous 
quick bread or ~32 large scoop muffins. 

What you need:
1 cup of butter (soft)
4 eggs
2/3 cup sour cream
1 cup granulated sugar
2/3 cup brown sugar 
1 tsp pure vanilla extract
With an electric hand mixer (or stand mixer) blend the above ingredients
4 cups all-purpose flour
1 tsp fine sea salt
2 tsp baking soda 
Place dry ingredients in a sifter
5 ripe bananas (peel and mush finely with a fork) yields ~2 cups
1 cup finely chopped raw pecans
1 cup semi-sweet chocolate chips
2/3 cup shredded, unsweetened coconut (+ additional 1 cup for topping)

 Sift the dry ingredients into the wet ingredients in three heats.  
That way the wet dry integrates very well.  I always hand
mix at this point, as to not over mix.

Fold in the banana

 Fold in the pecans, coconut and chocolate chips

Use a large scoop if you are going the muffin route, otherwise 
coconut oil two large loaf pans.

For muffins I am borderline obsessed with parchment muffin
liners.  They do not stick to the muffins, like the fluted cups
sometimes do and they look so dang cute, which is obvy 
important!  I buy them in big bunches on the internet.

here's a little picture from an old post.  After coating
the pan with coconut oil, cut a piece of parchment paper
for each pan, allowing a bit higher up the sides, so after
baking you can run a knife along the two shorts sides
of the pan, then use the parchment like handles to lift the 
bread out, and transfer it to a cooling rack.  

Top with a good sprinkle of coconut 

Bake at 325 degrees for 30 minutes if baking muffins and I would
guess at least one hour to one hour and 15 minutes for 
the loaf pans.  Make sure you do the toothpick check!!

Although them to cool a bit and then get your gobble on!!

 Benny Approved!!

Enjoy!
xo

Sunday, April 26, 2015

Crunchy Cornflake Cookies

I ate a  cornflake cookie at a cafe when we lived in Oklahoma and it was 
love at first bite!  I threw this recipe together almost 5 years ago, 
and the taste is deliciously spot on! These cookies are loaded with some 
of the best pantry goodies imaginable, so of course they are certain to be a hit!


 What you need:
 1 cup Butter, soft
1/2 cup + 2T Oil
1 cup Granulated Sugar
1 cup Brown Sugar
2 Eggs
2 cups Cornflakes
1 cup Quick Oats
1 cup Raw Pecans
1/2 cup Shredded Coconut (unsweetened)
3 1/2 cups AP Flour
1 T Baking Soda
3/4 tsp Salt
2 tsp Pure Vanilla Extract
1/4 tsp Cinnamon

Preheat oven to 325 degrees

Place the oats, coconut and pecans in a food processor fitted with the
sharp blade. Pulse until consistency of large crumbs.

I feel certain we over pulsed the three ingredients as I had eager helpers
in the kitchen, after their soccer game. Wouldn't have it any other way!

Next, pulse in the cornflakes until bits of cornflakes appear throughout.
Then set the food processor aside

In the green bowl are the wet ingredients whipped together: butter, oil,
eggs, granulated sugar, brown sugar and pure vanilla extract. I use an 
electric hand mixer to blend the wet ingredients.

In the sifter, awaiting a sift, are the dry ingredients: AP flour, 
salt, baking soda and cinnamon.

Slowly sift and hand mix the dry ingredients into the wet ingredients. 

Then fold in cornflake crumble goodness.

 Use a small scoop (this is ~2 T scoop, but you could do as small as 1 T)
Line 12 on a parchment lined baking sheet and press the dough 
balls flat with clean finger.  

Bake for ~13 minutes in a 325 degree oven.

Remove the cookies from the oven, then edges should be a tad 
darker in color than the centers.  Allow the cookies to cool for 
a minute on the baking sheet, then transfer to a wire rack 
for complete cool.

Enjoy. 
xo